Installation

Installing graphics might seem intimidating to some, but following a few key steps makes it less daunting.
To begin, it’s essential to prep the plastics/surfaces for optimal graphic adherence. Start by removing any existing graphics or stickers.
Before applying new graphics, it’s crucial to thoroughly clean all surfaces, especially brand new plastics that often come with a factory wax coat. We recommend using a suitable solvent such as Isopropyl Alcohol or contact cleaner. Ensure a thorough wipe-down of the plastics with the chosen solvent & let them air dry completely before proceeding with the graphics installation. Do NOT use other cleaners such as window cleaner, Simple Green, etc.

There are a few ways to go about installing graphics. If you achieve the outcome you are looking for, then you may be doing things right.
With that said, it is strongly NOT recommended to use the water & soap method. This will potentially ruin your graphics & is guaranteed to shorten their lifespan.
Start by “dry fitting” – hold your graphics up to your plastics with the paper still on the back. This will allow you to see how they will fit & give you an idea of where you will start.
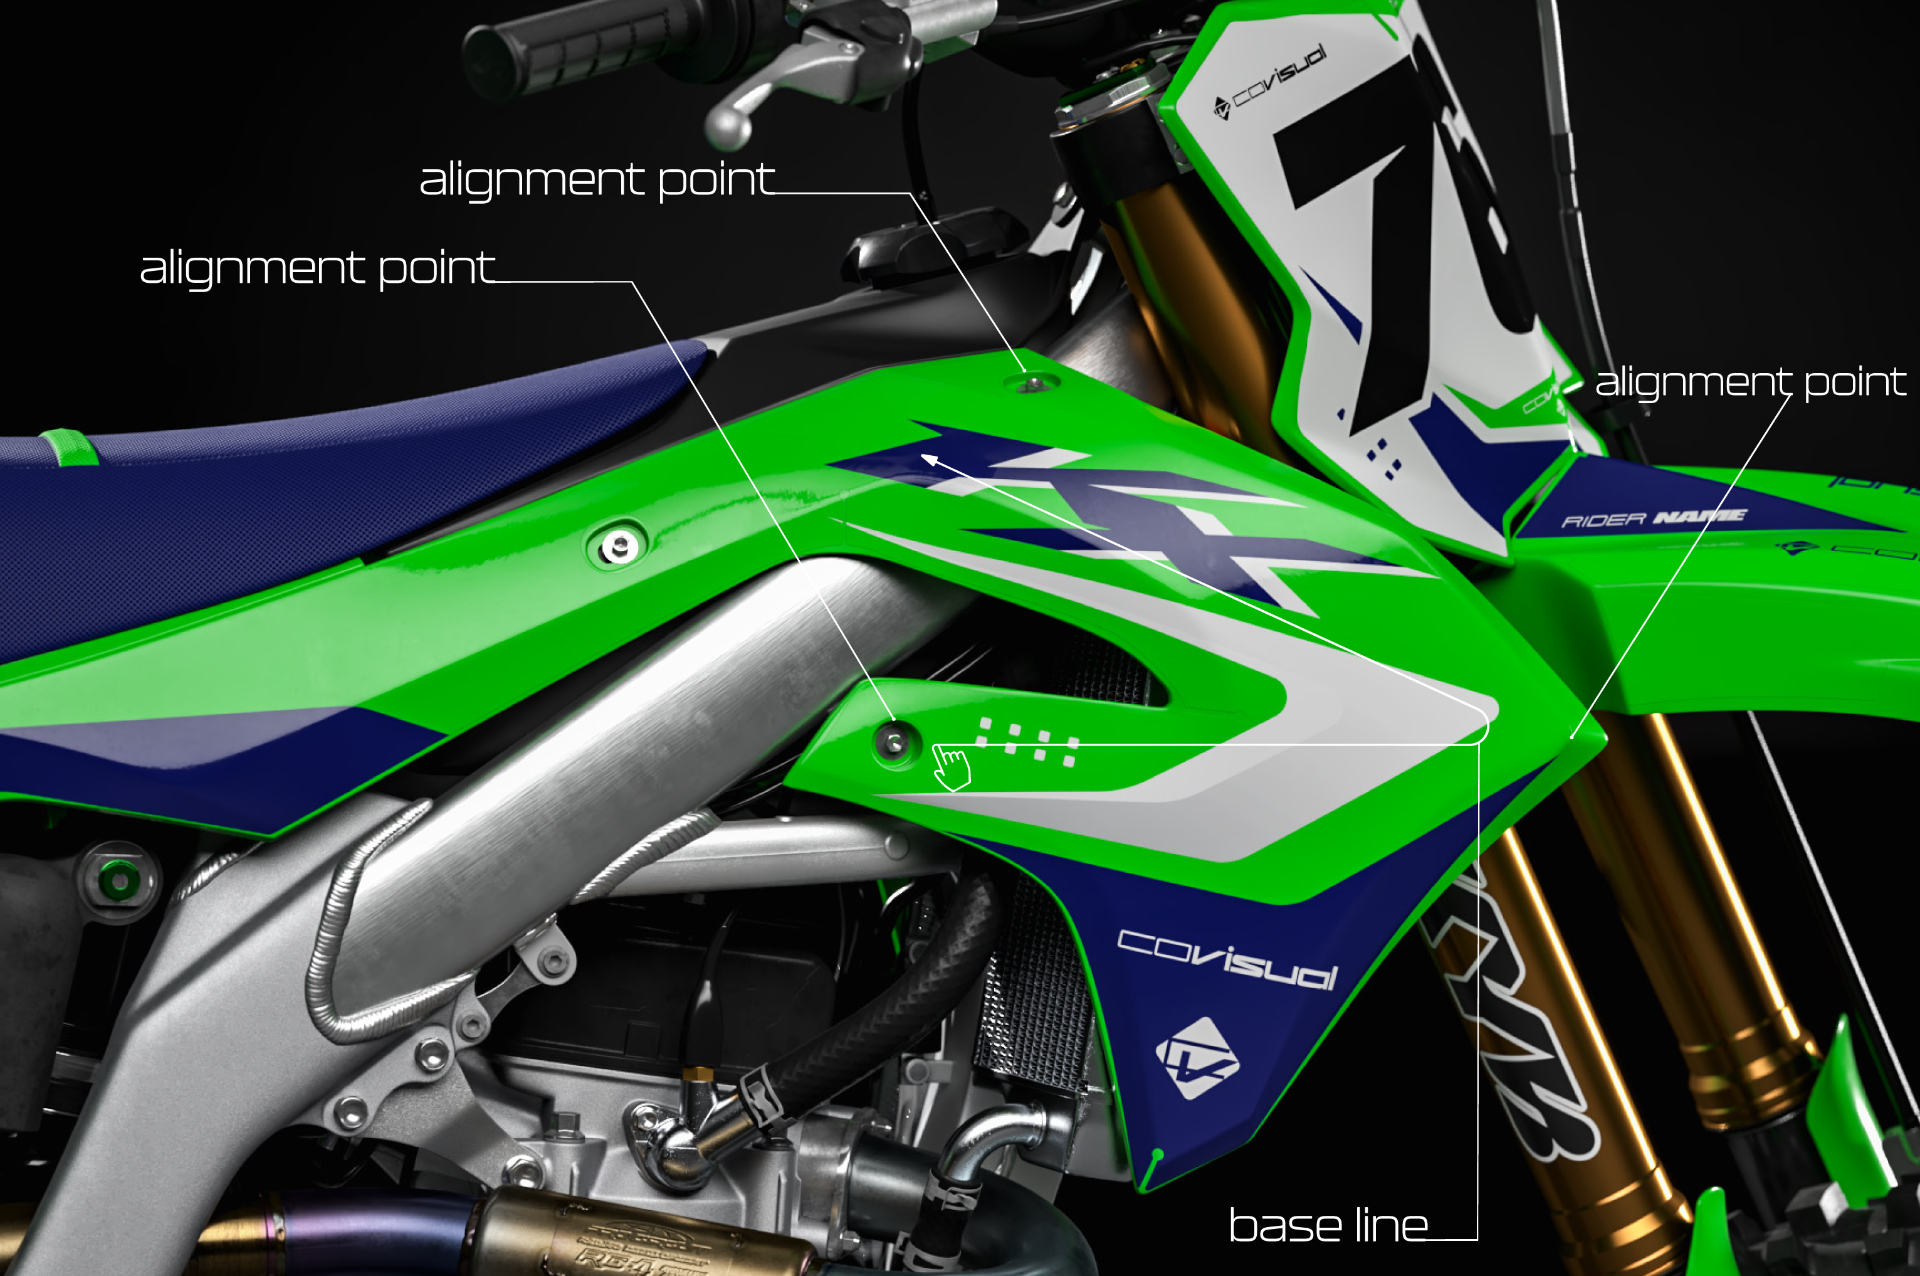
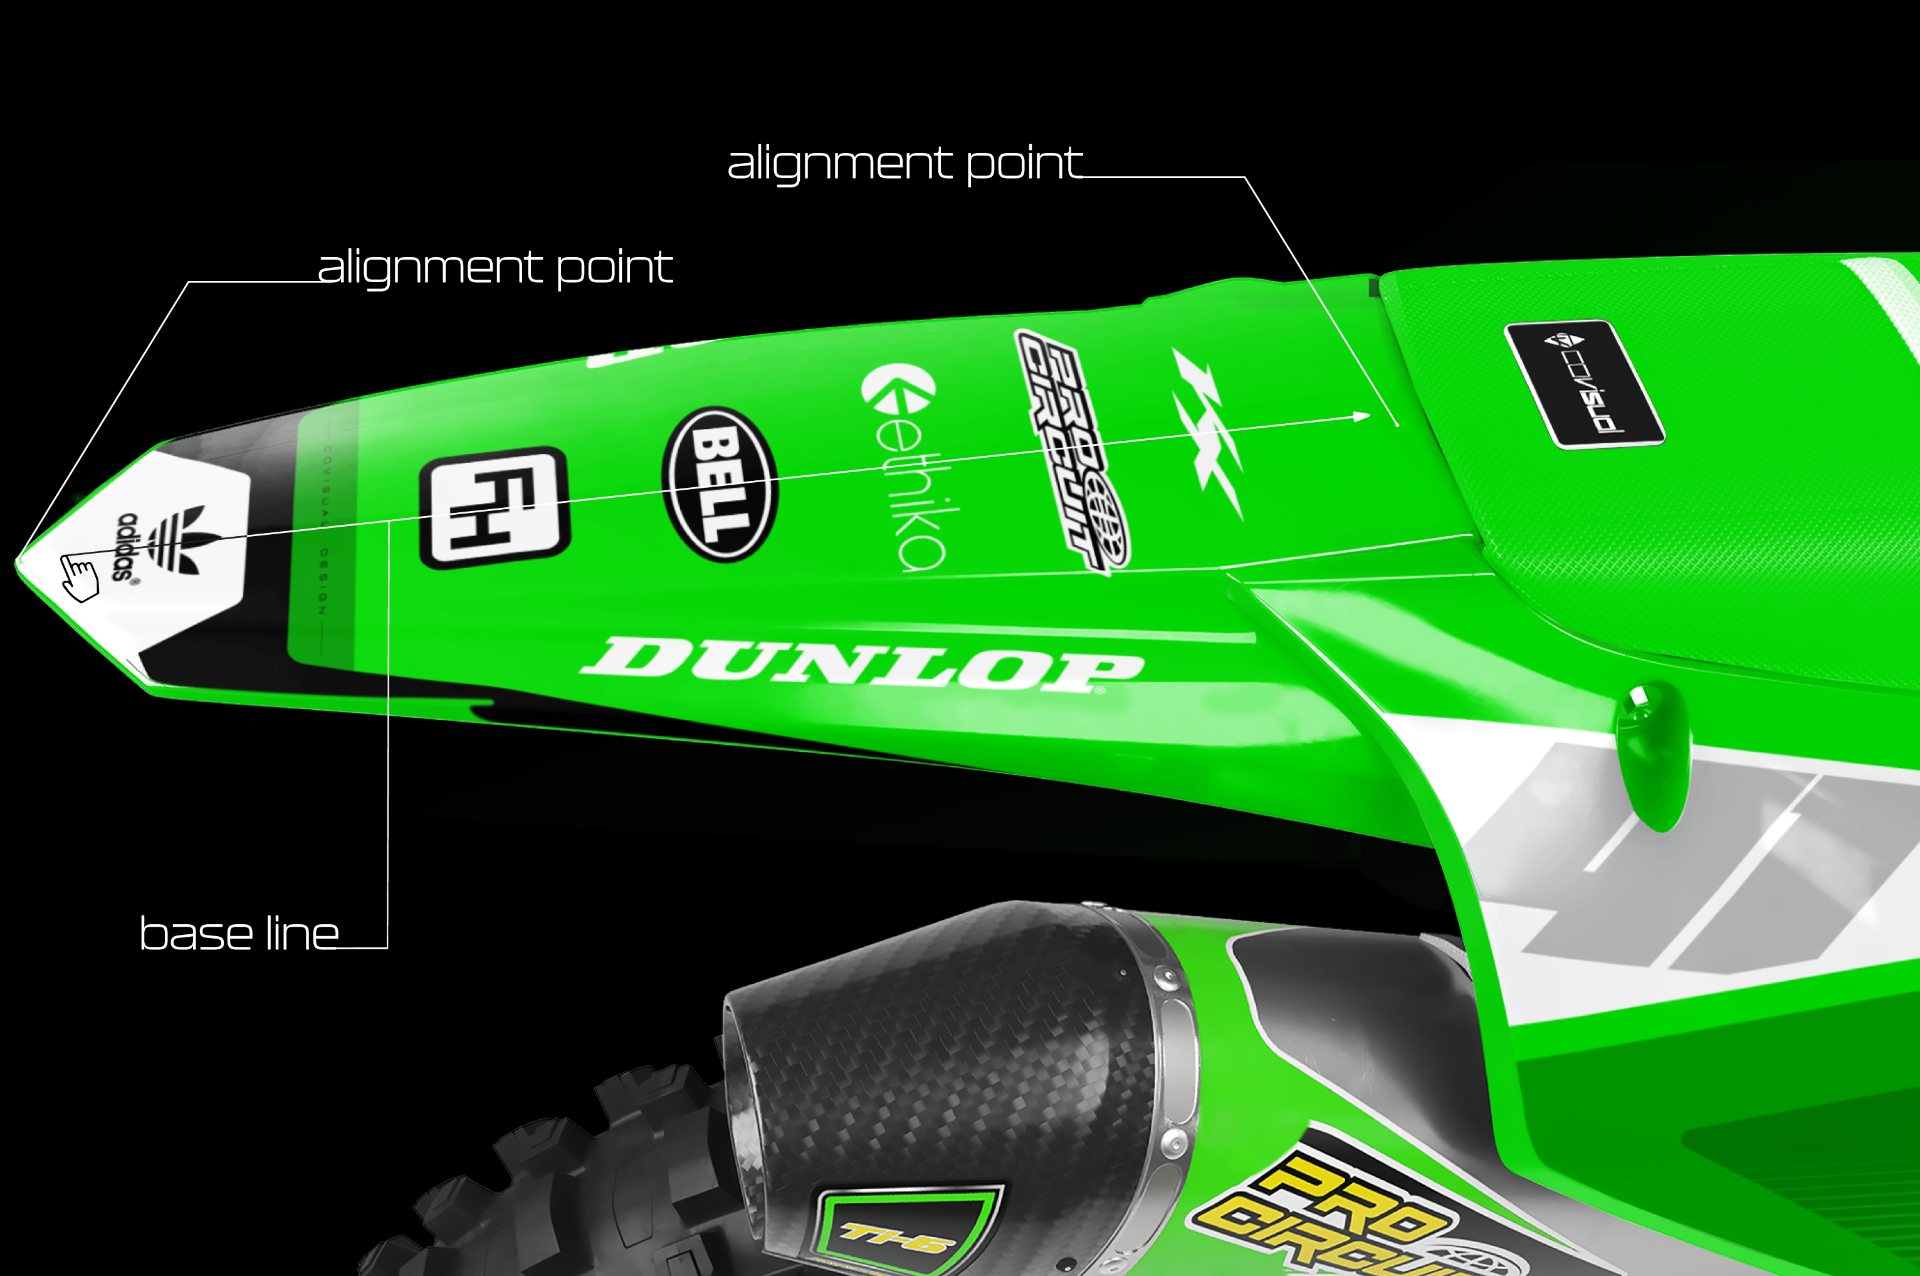
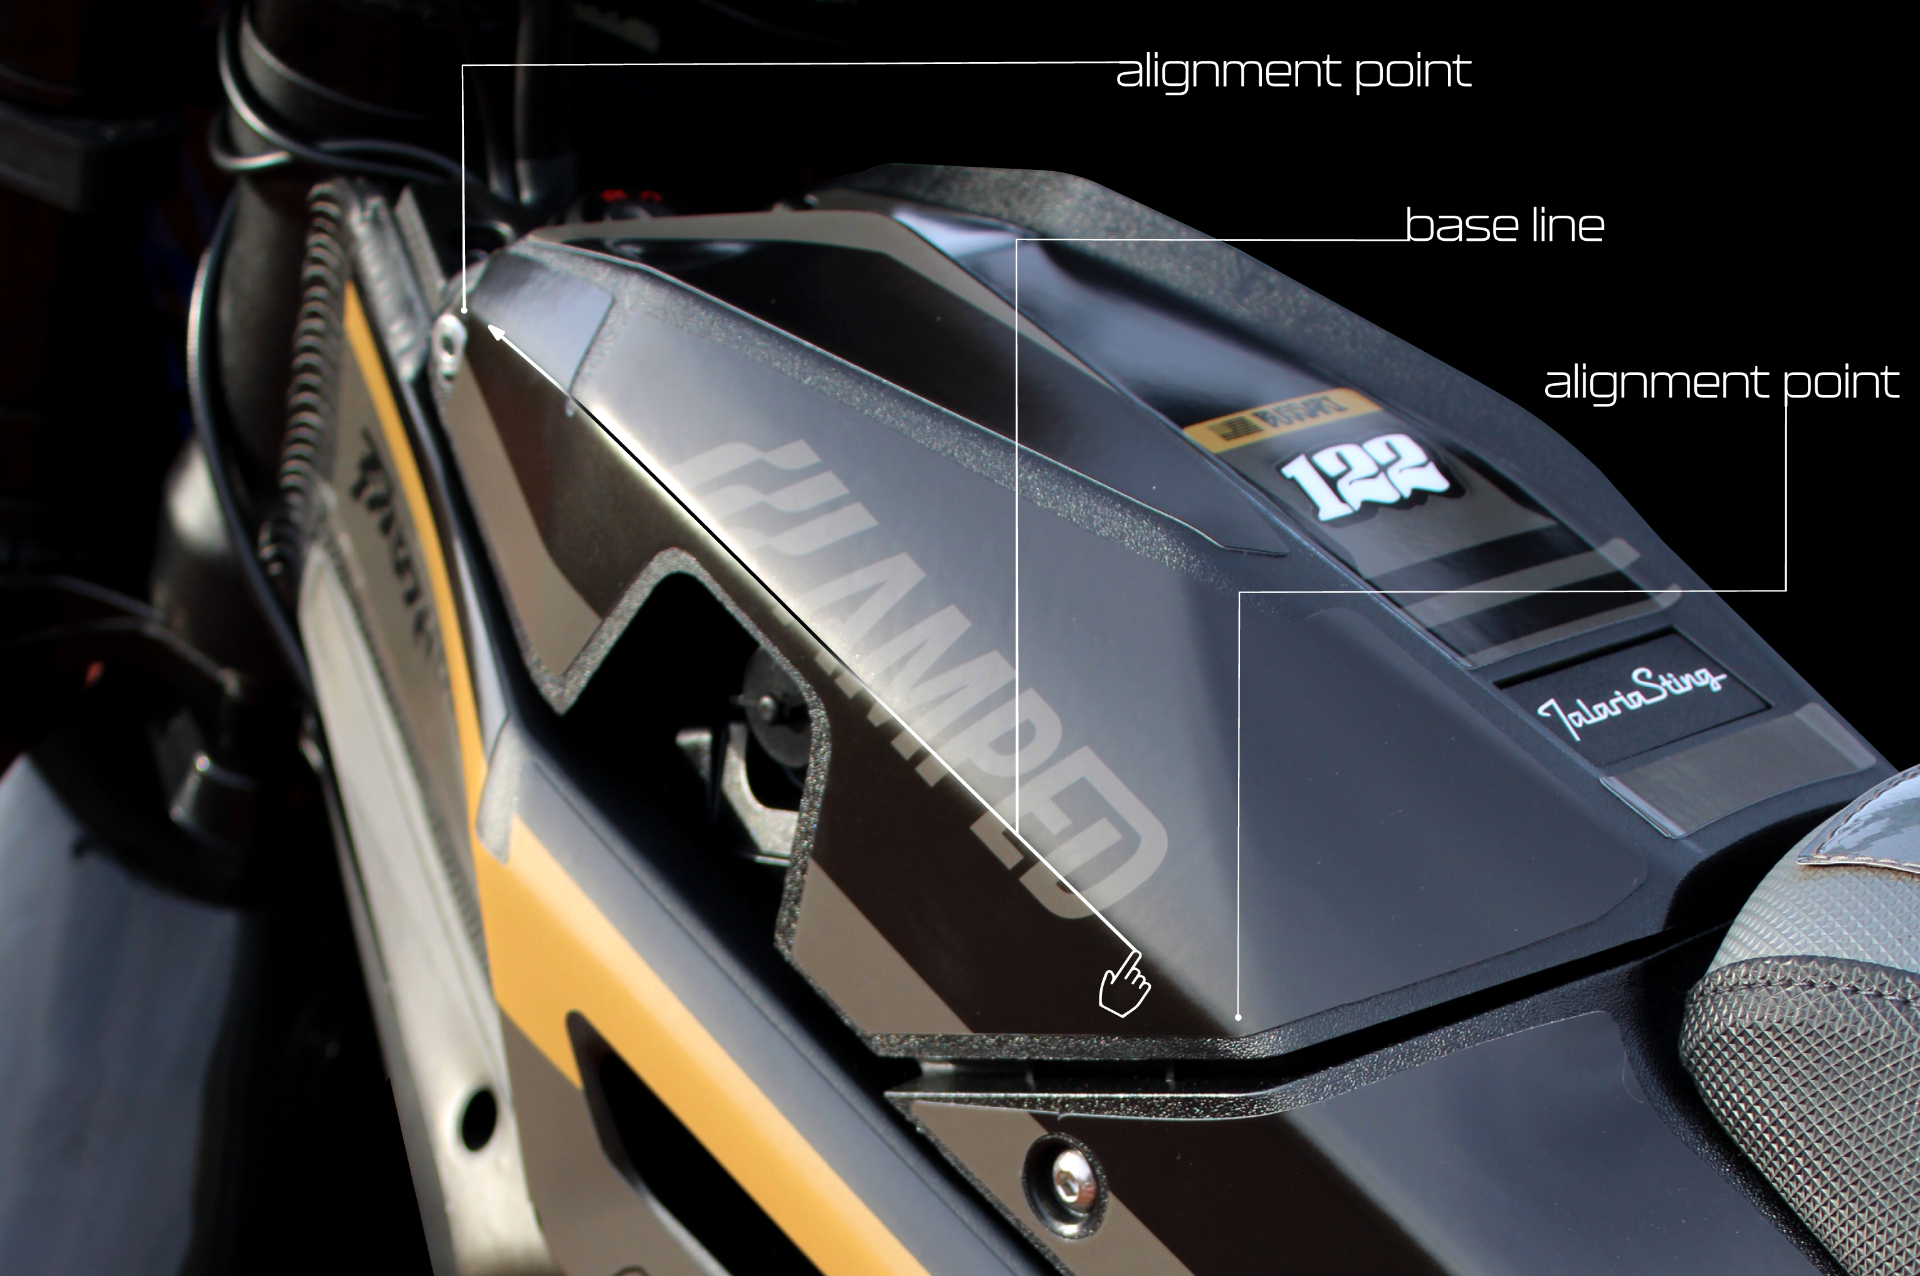
When applying a piece, start by tearing off a quarter or half of the backing paper. Align the graphic in place & “tack” a spot down while ensuring it is correctly aligned. You can align with a bolt hole or edge of the plastic.
Now, peel the rest of the paper & tack the other side down on another alignment point. This is the most crucial step – you will draw a “base line” through the entire graphic. This gives you a line to start working off of.
Begin going back & forth along this baseline, working up or down while pressing firmly without missing a gap that could create an air bubble. Repeat this through the whole decal.
Heat is your best friend when installing – It is vital to have a hair dryer or heat gun on hand. The material becomes extremely soft & pliable when warmed up, making installing around sharp edges or curves & stretching the graphic into place much easier. Ensure you do not overheat the graphic, as it may then become too soft or melt.
If you mess up, don’t be afraid to pull a section of the decal back up. Gently heat the pulled section until the material relaxes. Let it cool off completely before continuing.
Once your whole kit has been applied & installed as desired, it is important to then go over the whole kit, warming it up with your hair dryer/heat gun & pressing down on any lifting edges. This will ‘activate’ the glue & help it adhere strongly to its new surface. You need to repeat this once or twice following install, as you may find some corners/edges re-lift as they cool down.

Avoid riding or washing your bike for 2-3 days after installation. This allows the glue ample time to adhere to the new surface, & any lifting edges can be addressed by applying heat & firmly pressing them down.
If your graphics peel, wear out quickly, or don’t seem to fit right, please reach out. We’ll assess the situation & work together to find an appropriate solution.